How to Use GitHub For One-off Changes
2
Fork the Repo
For simple one off tasks, go to the Github website, and fork the repository (AKA repo) you are making a change to.
Forking the repo creates your a version of the site on your GitHub so you can make changes without impacting the original project.
Fork
On the GitHub Website, navigate to the repository you want to change. For example, Community Development's GitHub.
In the top-right corner of the page, click fork
 .
.
.That is it. You are now ready to add a file or make changes to any existing file.
3
Navigate to File/Folder
Go to your forked version of the repo and then the file you want to edit. For example, the main README file.
4
Edit/Add File
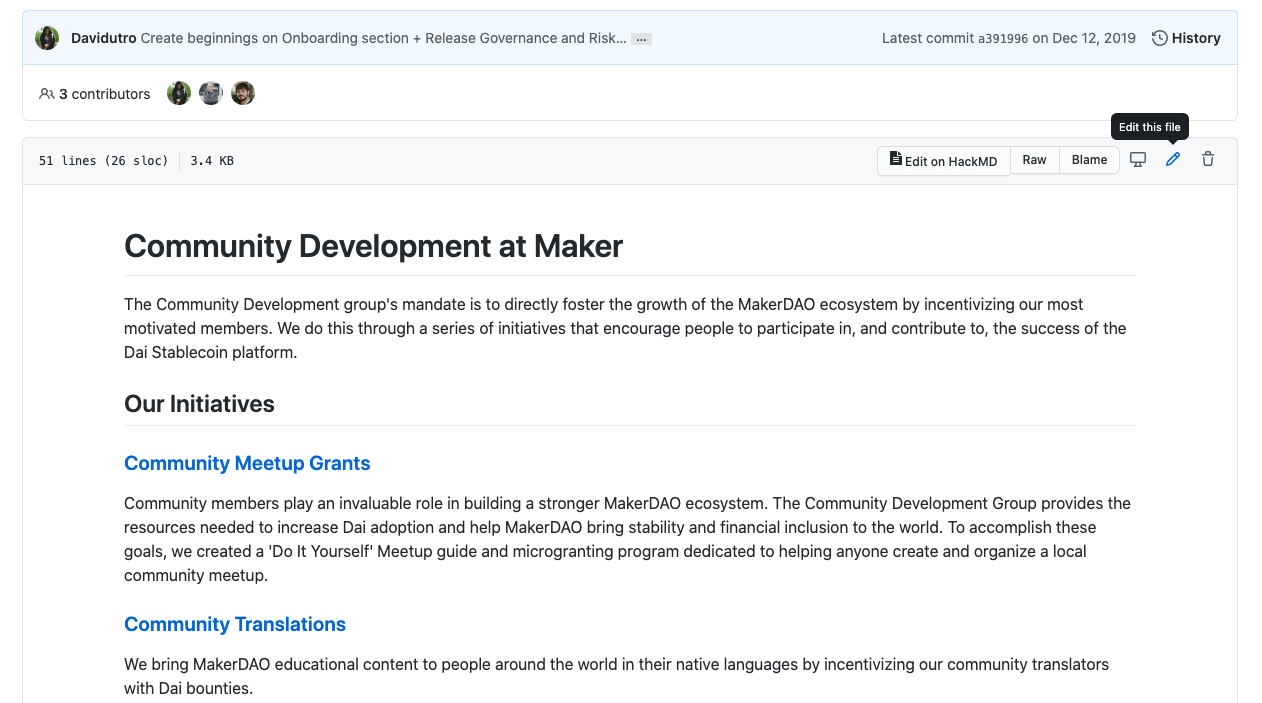
Edit File
Once in the file, press the pen icon to edit content. This will enter edit mode within Github. Edit mode allows making and proposing new changes without overwriting existing content.
Add File
Once in the folder that represents proper page placement, press “Create new file”. This will add a new .md file in your own GitHub account. This allows you to propose the addition of your content without publishing it right away.
5
Propose File Change/New File
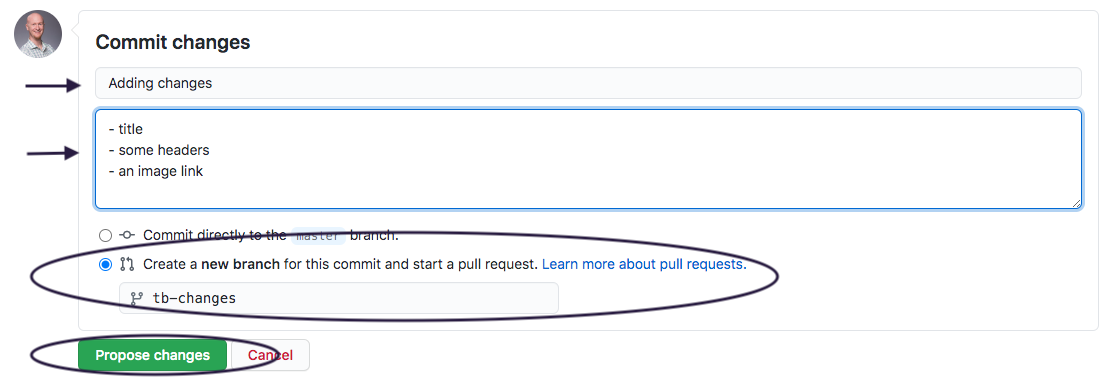
Once file changes are complete, you'll need to commit your changes. To do this scroll to the bottom of the page to where it says "Commit changes," write a short description of your changes, and then click the 'commit changes' button.
You will then be prompted to submit a Pull Request (PR). During that process you will be asked for an explanation of changes. This will help any reviewer understand what changes were made, so they can make a decision whether to publish it to the main branch/site. The github GUI makes this easy, but most contributors have a setup that leverages VScode, Atom, or another IDE.
6
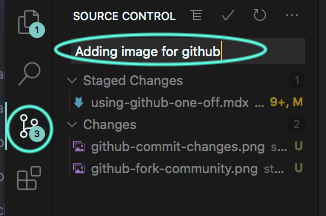
Stage Changes
Whether uploading a file or making changes to existing work, git will catch all changes made. Depending on the environment (code editor, github's website etc.) initiating a live change is as simple as staging fresh update(s) as commits. This image is in VScode:
7
Create Pull Request
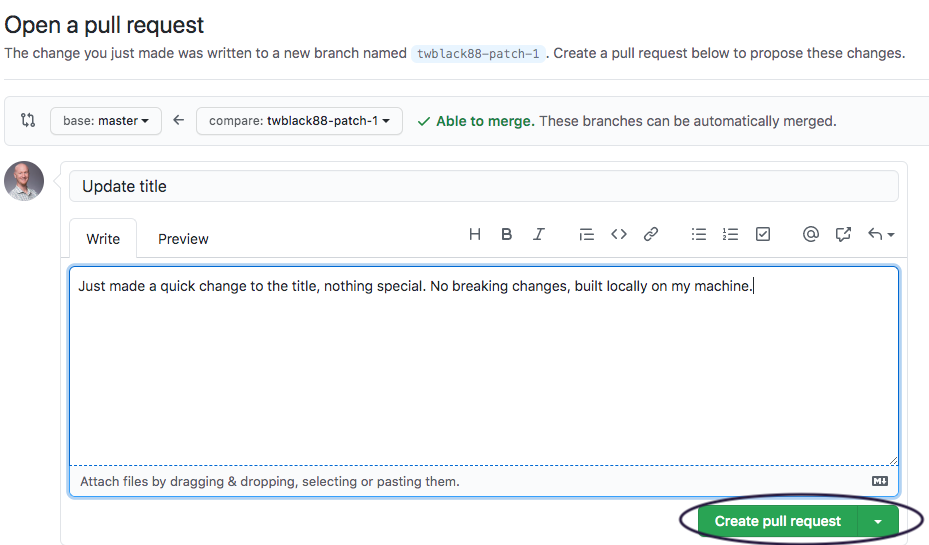
Whether in an IDE, or on Githubs interface, the next step is a pull request (PR). Pull Requests merge any changes (commits) tracked in Git, lumps them together, and suggests a path to merging.

Clicking compare and pull request opens the full pull request page, including checks for merging and fields to exaplin the changes.
8
Review/Merge
There might be feedback/changes on a PR. A reviewer can approve, request changes, or merge the edited file into the repo. Edits can be made with an open PR (often without leaving Github's website) and the PR will update automatically. Once happy, a reviewer will merge your work and it will be live on the site.